
The Brutal Truth About Death Road Mountain Biking (Yungas Road)
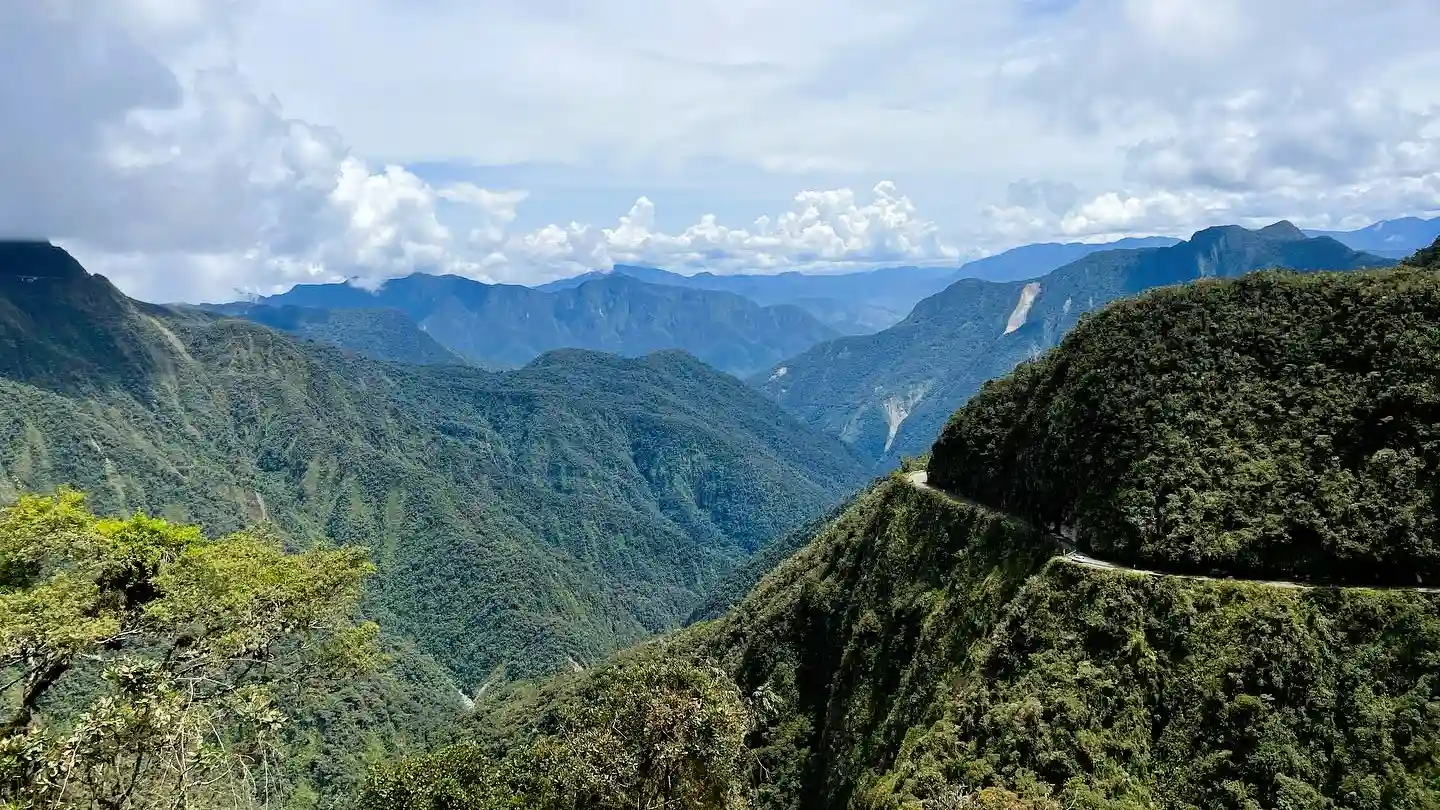
Table of Contents
- Quick Info Box
- Arrival: The Reality of the Starting Line
- The Blood-Stained History of North Yungas Road
- The Honest Reality Check: What Instagram Ignores
- The Route: Breaking Down the Descent
- Photography, GoPros, and Drone Rules
- How to Organise Your Ride from La Paz
- Weather, Climate, and Survival Seasons
- Visitor Facilities (Or Lack Thereof)
- Estimated Budget Guide & Tour Costs
- Essential Packing List
- Safety Rules & Mountain Etiquette
- Coroico: Post-Ride Recovery and Nearby Attractions
- Where to Eat and Sleep
- Frequently Asked Questions (FAQs)
Quick Info Box
- Exact Location: North Yungas Road, starting at La Cumbre Pass and ending near Coroico, Bolivia.
- GPS Coordinates: 16°20′09″S 68°02′26″W (Start point).
- Best Time to Visit: May to October (The dry season).
- Local Name: El Camino de la Muerte (Spanish for The Road of Death).
- Entry Fees: 50 BOB (Bolivianos) tourist tax, payable in cash on the road. Tour costs are entirely separate.
- Vibe/Highlight: Pure adrenaline, sheer vertical drops, and rapid climate shifts from freezing alpine peaks to sweltering Amazonian jungle.
Arrival: The Reality of the Starting Line
You do not ease into Death Road mountain biking. You start at La Cumbre pass at a lung-crushing 4,700 metres (15,400 feet) above sea level.
The air is freezing, thin, and often cuts right through your layers. You are handed a full-face helmet, heavy protective gear, and a dual-suspension mountain bike. The smell of diesel fumes from passing lorries mixes with the nervous sweat of backpackers around you.
There is no warm-up. You are quite literally pushed off the edge of the Andes. You will drop 3,600 metres in altitude over the next 64 kilometres. The visual shift is staggering. You begin in a bleak, grey, icy wasteland and finish hours later, sweating in the dense, green, humid Amazon basin.
The Blood-Stained History of North Yungas Road
This is not a purpose-built extreme sports park. The Yungas Road was carved into the sheer cliff faces of the Cordillera Oriental mountain range in the 1930s. It was built by Paraguayan prisoners of war during the Chaco War.
For decades, it was the sole land link between the Bolivian capital, La Paz, and the northern Amazon region. Heavy goods vehicles, buses, and cars squeezed past each other on a dirt track, often barely three metres wide.
The road earned its grim moniker, El Camino de la Muerte, because roughly 200 to 300 people died here annually. Vehicles routinely plunged off the 600-metre cliffs. In 2006, the Bolivian government finally opened a modern, paved bypass on the opposite side of the valley. Today, the original dirt road is almost exclusively used by mountain bikers and local farmers.
The Honest Reality Check: What Instagram Ignores
Let us get one thing straight: people still die here. It is rare, but it happens. Usually, it is because of sheer stupidity, overconfidence, or cheap equipment.
If you book a bottom-tier tour company to save £20, you are gambling with your life. Cheap tours use bikes with worn brake pads, bent rotors, and bald tyres. When you are rolling down a 10% gradient on loose gravel towards a 500-metre drop, your brakes are your only insurance policy.
The physical toll is also wildly understated. Your hands will cramp violently from gripping the brake levers for hours. The dust will coat your teeth and sting your eyes. If you go during the rainy season, you will ride through knee-deep mud and waterfalls that blast freezing water directly onto your skull. It is physically exhausting.
The Route: Breaking Down the Descent
Death Road mountain biking is not one continuous blur. It is broken down into distinct sections by the guides, allowing your hands to recover and your brakes to cool down.
The Paved Alpine Start
The first 20 kilometres are actually on a paved tarmac highway. This is where you get comfortable with the bike. You will reach speeds of up to 60 km/h here. The danger here is not falling off a cliff, but rather losing control on a fast corner or being clipped by a passing bus.
The Checkpoint and The Dirt
After paying your 50 BOB local tax, the tarmac ends. You turn left onto the original Death Road. The surface immediately turns to loose rocks, gravel, and packed dirt. The road narrows drastically. There are no guardrails. Look right, and the cliff simply drops away into the clouds.
San Juan Waterfalls
Midway through the dirt section, you ride directly underneath sheer waterfalls cascading over the cliff edge. The road turns to slick mud here. You cannot avoid getting wet. Guides usually stop here for the classic photograph, but you must keep moving carefully, as the rocks are incredibly slippery.
The Final Jungle Run
As you drop below 2,000 metres, the air gets thick and hot. You peel off your jackets. The road flattens out slightly, but the fatigue sets in. This is where most minor accidents happen—people lose concentration, hit a large rock, and go over the handlebars into the ditch. You finally roll into the Yolosa valley, coated in dust, sweat, and relief.
Photography, GoPros, and Drone Rules
Do not try to hold your phone while riding. You will crash.
Bring a GoPro and mount it securely to your helmet or chest harness (most good tour companies provide helmets with built-in mounts). For static shots, wait until the guides stop the group at designated safe points.
The lighting is notoriously tricky. At the top, you deal with harsh alpine glare. In the jungle canopy, it is dark and dappled. The best photos are taken by the guides themselves, who ride ahead and position themselves on corners with DSLR cameras.
Are drones allowed? Technically, yes, there is no blanket ban on the road. However, flying a drone here is incredibly risky. The valley creates unpredictable, violent wind tunnels. Furthermore, you will not have time to pilot a drone safely without holding up your entire group. Leave the drone in your bag.
How to Organise Your Ride from La Paz
You cannot (and absolutely should not) do this independently. You must book a tour from La Paz.
The industry is saturated, but you get exactly what you pay for. Top-tier operators like Gravity Assisted Mountain Biking or Barracuda Biking charge premium rates. In return, you get Kona or Santa Cruz dual-suspension bikes, strict daily mechanic checks, English-speaking guides trained in wilderness first aid, and a support vehicle that follows closely behind.
Do not book tours off the street on the morning of the ride. Book at least 48 hours in advance. You will meet early in La Paz (usually around 6:30 AM) and take a minibus up to La Cumbre.
Weather, Climate, and Survival Seasons
The weather on North Yungas Road dictates your survival.
The Dry Season (May to October): This is the best time to ride. The skies at the top are usually clear, offering massive views of the Andes. The dirt road is hard-packed. The main annoyance is the thick dust kicked up by the riders in front of you.
The Rainy Season (December to March): Think very carefully before riding during these months. The road turns into thick, slick mud. Fog rolls in, reducing visibility to less than ten metres. Landslides are common and can block the route for days. If you ride in the rain, you will be soaked to the bone and shivering for the first two hours.
Visitor Facilities (Or Lack Thereof)
- Washrooms: There are basic, unplumbed concrete toilets at the starting point at La Cumbre, and usually one stop at the entrance to the dirt section. Take your own toilet roll.
- Mobile Signal: Forget about it. Once you start the descent, you will lose signal entirely. Neither Entel nor Tigo will work in the deep valley.
- Food and Water: Your tour operator will provide snacks and water from the support vehicle, but there are no shops or ‘kades’ along the cliffside. You must carry your own water bottle in your harness.
Estimated Budget Guide & Tour Costs
Prices fluctuate based on the Bolivian economy and the quality of the bike you choose. Always pay for the dual-suspension upgrade; your spine will thank you.
| Item/Service | Cost Estimate (BOB) | Cost Estimate (USD/GBP) | Practical Notes |
| Premium Tour (Gravity, etc.) | 700 – 850 BOB | $100 – $125 | Includes top-tier bike, full gear, guides, photos, and a buffet lunch at the end. |
| Budget Tour (Use with caution) | 350 – 450 BOB | $50 – $65 | Older bikes, basic V-brakes, and less experienced guides. High risk. |
| Local Tourist Tax | 50 BOB | $7 | Mandatory fee paid in cash at the road entrance. Not included in tour prices. |
| Tip for Guides | 35 – 70 BOB | $5 – $10 | Highly recommended if the guides kept you safe and fixed bike issues promptly. |
| Post-Ride Beers | 15 BOB | $2 | Usually purchased at the finishing point in Yolosa. |
Disclaimer: Bolivian prices fluctuate. Use this as a baseline estimate for 2026. Always confirm what is included (transport back to La Paz, meals, photos) before handing over cash.
Essential Packing List
Do not bring a large backpack. The support van will carry your main daypack. You only wear what you need to survive the descent.
- Layers: A thermal base layer, a fleece, and a windbreaker. You will take them off one by one as you descend into the jungle.
- Closed-toe shoes: Sturdy trainers are mandatory. Do not attempt this in hiking boots (too bulky for pedals) or sandals.
- Sunglasses or Clear Goggles: Essential to stop the dust and flying gravel from blinding you.
- Buff or Bandana: To pull over your mouth to stop you from breathing in heavy dust.
- Cash: Exact change for the 50 BOB tourist tax and extra for a well-deserved beer at the end.
- Mosquito Repellent: Crucial for the bottom section in Yolosa, where the jungle bugs are vicious.
Safety Rules & Mountain Etiquette
Ride on the Left: This is the most critical rule on the Yungas Road. Unlike the rest of Bolivia, vehicles here drive on the left. Why? So the driver can physically stick their head out of the window to see exactly how close their tyres are to the cliff edge. As a cyclist, you will ride on the left—which means you are always on the cliff side, not the mountain wall side.
Brake Bias: Never grab the front brake heavily on loose gravel. You will flip over the handlebars. Use 70% rear brake and 30% front brake to manage your speed.
Let Fast Riders Pass: If someone behind you wants to go faster, pull over safely to the mountain-wall side and let them pass. Ego has no place on a 600-metre cliff.
Coroico: Post-Ride Recovery and Nearby Attractions
The ride finishes in Yolosa, at the bottom of the valley. From here, you are a short drive from the town of Coroico. Most premium tours include a stop at a local animal refuge or a jungle lodge for a shower and a buffet lunch before the gruelling three-hour drive back up to La Paz.
If you have time, do not just head straight back to the city.
- La Senda Verde Wildlife Sanctuary: Located right at the finish line in Yolosa. It is a refuge for rescued Amazonian wildlife, including spectacled bears, monkeys, and exotic birds. It takes about an hour to tour.
- Coroico Town: A 20-minute uphill drive from Yolosa. It is a sleepy, warm Afro-Bolivian town perfect for relaxing for a night or two.
Where to Eat and Sleep Nearby
If you decide not to take the support van back to La Paz immediately, Coroico offers excellent downtime.
- El Cafetal (Coroico): A brilliant spot offering French and local cuisine with panoramic views of the jungle valleys you just rode through. Excellent coffee.
- Hotel Esmeralda (Coroico): A backpacker favourite. It has a swimming pool, decent Wi-Fi, and cold beer. It is exactly what you need after 64 kilometres of dust and terror.
- La Senda Verde Eco-Lodge (Yolosa): You can actually sleep in treehouses inside the animal sanctuary right where the bike ride ends.
Frequently Asked Questions (FAQs)
Do I need to be a professional mountain biker to do this?
No. You do not need technical mountain biking skills, as there are no jumps or extreme rock gardens. However, you must be highly confident on a bicycle, have strong stamina, and possess absolute common sense regarding speed control.
Is it safe to do the Death Road tour in the rain?
It is physically possible, but highly discouraged. Rain creates slick mud, triggers minor landslides, and obscures the sheer drops in thick fog. If heavy rain is forecast, reschedule your tour.
Can I ride back up to La Paz instead of taking the van?
Technically, yes, but virtually nobody does. It is a 3,600-metre vertical climb over 64 kilometres on loose gravel at high altitude. Unless you are an elite endurance athlete, take the support van back up.
What happens if I get too scared halfway down?
If you freeze up, have a panic attack, or simply get too tired, you can hand your bike to the guide and sit in the support van that follows the group. There is zero shame in doing this.
How long does the actual biking take?
The riding itself takes about 4 to 5 hours, depending on the speed of your group. With the drive from La Paz, the safety briefings, photo stops, and the post-ride lunch, expect it to be a full 12-hour day trip.